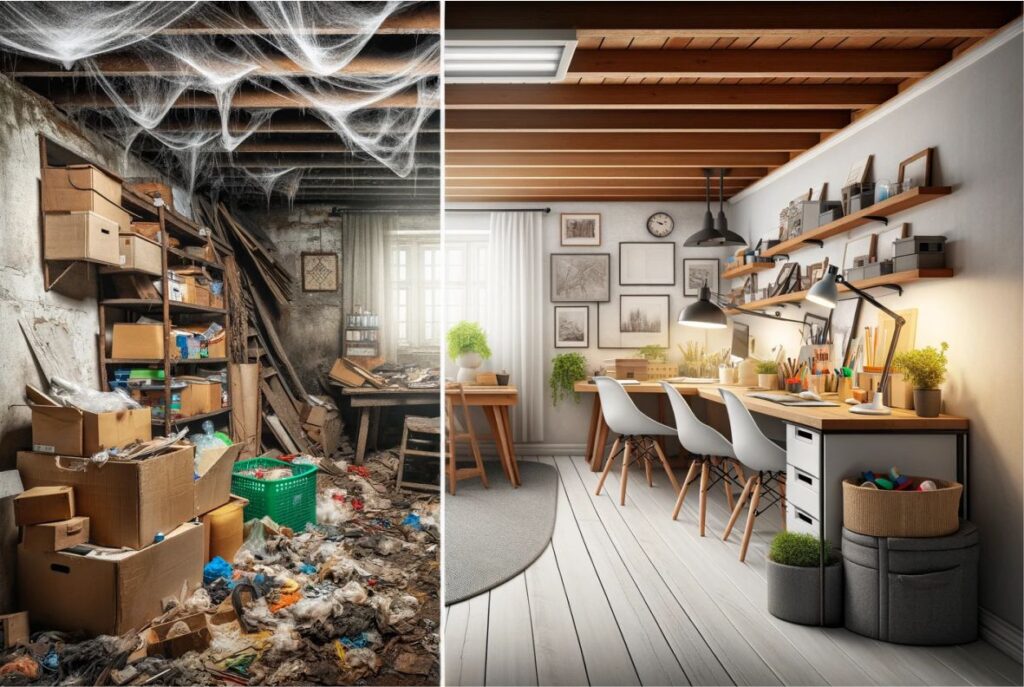

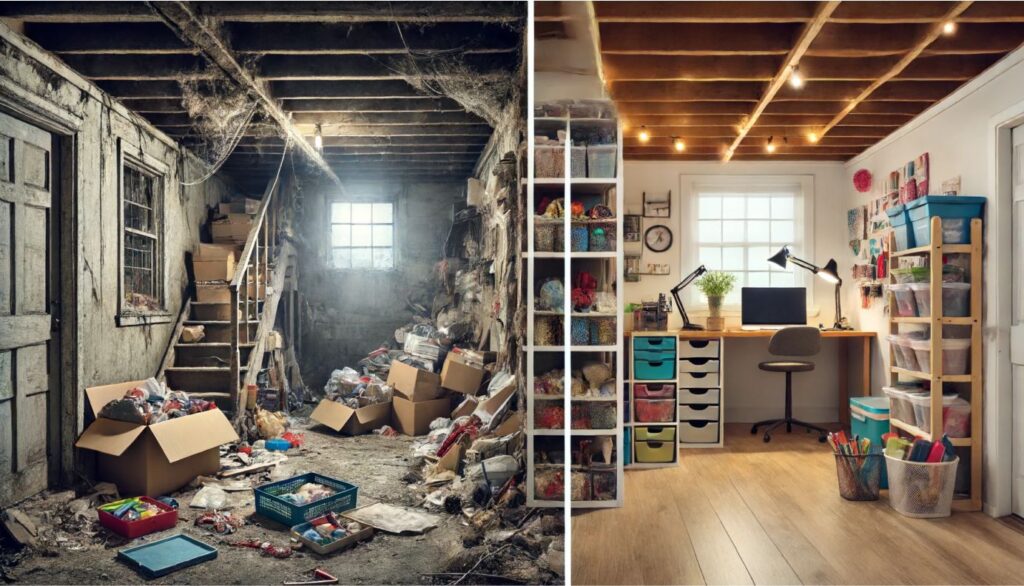
Looking to transform your unfinished basement into a creative and functional space? Assess the area and set a budget, then move on to include must-have elements like good lighting and storage. We’ve got you covered on everything you need to know.
Get inspired with creative ideas and DIY projects to make your unfinished basement craft room one-of-a-kind.
Why Choose an Unfinished Basement for a Craft Room?
Having an unfinished basement for your craft room makes total sense when you think about the cost-effectiveness of it all. The basic structure is already there, so you have the freedom to make it completely your own. Design storage solutions, workstations, and display areas that fit your crafting needs perfectly.
Just picture it – plenty of space to keep your tools, supplies, and materials all within easy reach. The unfinished basement gives you the freedom to customize every aspect, from choosing paint colors to setting up specialized lighting for the ideal crafting environment.
How to Plan and Design an Unfinished Basement Craft Room?
When you’re planning and designing an unfinished basement craft room, you’ll need to follow a series of steps to turn that blank canvas into a space that’s organized, well-lit, and full of creative inspiration for all your crafting projects.
1. Assess the Space
The first step in planning your unfinished basement craft room is assessing the space. Take note of existing storage, lighting, and flooring options. Consider the current storage solutions in the room to figure out what works, what could be better, and what needs to be added.
Check out the lighting conditions; look at natural light sources and where artificial lighting fixtures are placed. Take a good look at the flooring, too, see its condition, and think about whether it needs upgrades or changes.
If you run into challenges like not enough natural light or uneven flooring, get creative! Try installing more lighting or throw down some area rugs to make the space work better.
2. Determine Your Needs and Wants
To create a craft room that perfectly fits your hobbies, you need to figure out what you really want and need. Whether you’re all about DIY projects and need a solid workbench, or you prefer a cozy sewing corner, it’s all about making the space work for you.
When you’re setting up your craft room, the key is to think about the activities you actually do. If you’re all about woodworking, make sure you have a sturdy workbench with plenty of storage for all your tools and materials. But if jewelry-making is more your thing, focus on organizing your supplies like beads, wires, and pliers.
3. Create a Budget
When setting up your craft room, creating a budget is key to keeping your basement renovation on track and making sure you have a functional and inspiring workspace.
To nail down a budget for your craft room project, list all the materials, furniture, and potential DIY projects you want to include. It’s smart to do some price-checking and shop around to snag the best deals and save some dough. Think about repurposing items you already have to keep costs down.
Focus your spending on must-have items that will really amp up your craft room vibe, and allocate your funds wisely. With some careful planning and budget management, you will whip up a gorgeous and organized craft room without breaking the bank.
Basic Elements of an Unfinished Basement Craft Room
You want to make sure you’ve got all the essential elements in place when you’re turning that unfinished basement into a craft room. That means having proper lighting, enough storage space, work surfaces that suit your needs, and comfy seating.
1. Proper Lighting
In your craft room, install proper lighting to make it a welcoming and well-lit space where you can get creative comfortably.
When you’re working in a basement with limited natural light, think about adding ambient lighting –ceiling fixtures or wall sconces to brighten up the whole area. Pair them with task lighting, such as adjustable desk lamps, to focus on specific work spots.
To increase the brightness, go for light-colored walls, furniture, and decor that reflect and amplify the artificial lighting. Try hanging mirrors strategically to bounce light around and make the room seem bigger and brighter.
2. Adequate Storage
In your craft room, it’s essential to have enough storage to keep all your crafting supplies in order and within reach.
Having different storage solutions such as shelves, cabinets, and bins really boost your workflow. When everything is neatly organized, you waste less time hunting for materials and have more time to let your creativity shine.
Not only does a well-organized craft room banish clutter, but it also sets the stage for an aesthetically pleasing workspace that will supercharge your productivity. With a workspace that’s well-arranged, you will easily lay your hands on whatever you need, allowing your creative juices to flow freely without any pesky interruptions.
3. Work Surfaces
When you’re tackling your DIY projects, having the right work surfaces is key to getting things done smoothly.
Craft tables are perfect for spreading out materials and tools, giving you space to juggle multiple projects at once. On the flip side, workbenches come with handy storage options and extra features like drawers and pegboards to keep your workspace organized.
As you set up your workspace, think about things such as lighting, easy access to tools, and setting up your chair ergonomically.
4. Comfortable Seating
Comfortable seating is necessary in your craft room for extended work periods without feeling uncomfortable.
Plush armchairs or ergonomic task chairs offer support and add a touch of style. You could also create a cozy reading nook – just add a cushioned window seat or a comfy bean bag chair to give yourself a relaxing spot within the space.
It’s a good idea to have a versatile seating arrangement with a mix of seating options to accommodate different activities. The right furniture creates a cozy and inviting atmosphere, turning your craft room into a place you actually enjoy spending time in.
What are Some Creative Ideas for an Unfinished Basement Craft Room?
Turning an unfinished basement into a craft room gives you the chance to explore a whole new realm of creative possibilities. You get to create a space that’s all about sparking inspiration and keeping things organized.

1. Use Pegboards for Organization
Using pegboards in your craft room is a fantastic way to keep your tools and supplies organized and easily within reach. They offer a versatile and customizable solution for storing items like scissors, tape, ribbons, and more. With different hooks, baskets, and shelves, you create a storage system that suits your crafting needs perfectly.
If you’re a DIY enthusiast, set up a pegboard. Just attach it to a wall and arrange your accessories however you like. Feel free to get creative with paint or fabric to match your pegboard to the room’s decor. It’s a stylish and practical way to keep things organized.
2. Utilize Vertical Space
Try incorporating shelves high up on the walls to store items that you don’t use often. Keep them within reach but out of the way. Hanging storage units are also a great option for holding supplies like ribbons, tapes, and tools right at your fingertips.
❗❗ Create a system where you categorize and store items based on how frequently you use them. Keep your workspace clutter-free and super efficient.
3. Incorporate a Cozy Reading Nook
If you want to elevate your craft room, consider adding a snug reading nook where you kick back and get inspired for your next project. The first step is to pick out a comfy armchair or plush reading chair, throw in a soft blanket, and toss in a couple of decorative pillows for good measure.
Don’t forget to have a small side table nearby for your favorite reads or a cup of tea. Set the mood with cozy lighting, such as a table lamp or some twinkling string lights. Hang up framed Inspirational quotes or artwork that speaks to your creative soul.
The cozy little corner offers a relaxing escape within your craft room and acts as a haven for unwinding and letting your creativity flow.
4. Add a Chalkboard or Whiteboard Wall
Consider adding a chalkboard or whiteboard wall. It’s a game-changer for keeping track of all your ideas, plans, and sources of inspiration.
Imagine having a dedicated space where you freely jot down your thoughts, sketch out designs, or create all-important to-do lists.
With a chalkboard or whiteboard wall, you easily wipe away and tweak information as needed.
To get started, all you need is some special paint or adhesive-backed sheets that transform any smooth surface into a writable area. Once it’s up, use it to stay organized with project timelines, set goals, or even sketch out intricate patterns for your crafts.
Tips for Decorating an Unfinished Basement Craft Room
When you’re transforming that unfinished basement into your dream craft room, you’ll want to pick out the perfect paint colors, find some cool wall art, and choose the best flooring to make the space cozy and inspiring.
1. Choose a Color Scheme
When choosing the right color scheme for your craft room, you want to create an atmosphere that sets the stage for creativity to flourish.
As you select colors for your craft room, think about how different shades make you feel. Warm tones such as yellows and oranges bring energy and inspiration, making them perfect for a vibrant, creative space. On the other hand, cooler tones like blues and greens evoke a sense of calm and focus, which is great for maintaining a serene environment.
For added depth and visual appeal, try incorporating accent colors sparingly to highlight specific areas or features. Play around with complementary colors to achieve balance and keep things visually engaging. Remember, the ultimate goal is to showcase your personality and create a space that motivates and inspires your craft projects.
2. Add Personal Touches
Adding personal touches to your craft room decor makes the space feel like it’s yours, filled with things that inspire and motivate you.
When you add wall art that really speaks to your creative side, boring walls turn into a whole gallery of inspiration. Think about throwing in some custom decorations, such as handmade garlands or personalized storage containers. Not only do they add charm to the room, but they’re also super practical.
❗❗ And don’t forget about displaying special mementos, such as:
- vintage buttons,
- postcards from your travels,
- heirloom trinkets.
They bring back memories and boost your creative vibes. When you arrange all elements with care in your craft room, you’re creating a special spot where you will fully immerse yourself in your artistic passions.
3. Incorporate Functional Decor
When you’re setting up your craft room, it’s all about making sure everything looks good and serves a purpose. Want to merge style with functionality in your creative space? Try picking furniture that looks great and offers storage solutions. Think about choosing storage ottomans or benches that can be used as seating and have hidden compartments to store all your crafting supplies. Wall shelves or pegboards are another great option, doubling as decorative pieces and handy tools to organize your materials.
DIY Projects for an Unfinished Basement
When you tackle DIY projects for your unfinished basement craft room, you’re not just adding a personal touch – you’re also bringing in some practical solutions. Think about creating a custom worktable, coming up with innovative storage ideas, and setting up a pegboard wall. It’s all about making the space your own while making it work for you.
1. Create a Custom Worktable
When you’re setting up your craft room, creating your own custom worktable is the way to go. It gives you a workspace that’s just right for you, tailored to your needs and preferences.
The first thing you need to do is figure out the size of your workbench. Take into account how much space you have and the kinds of crafting projects you usually tackle.
You’ve got options when it comes to materials: solid wood, plywood, or even reclaimed materials. Pick based on the look you’re going for and how durable you need it to be.
❗❗ Don’t forget about adding some extra features to make your worktable even better. Think about storage, adjustable height, and lighting to really boost its functionality.
When you customize your workbench, you’re not just making a space for your crafts—you’re adding your own personal touch to your creative area.
2. Make Your Own Storage Solutions
When you’re organizing your craft room, why not get creative with some DIY storage solutions? It’s a fun and practical way to keep all your supplies in order while putting your upcycling skills to good use.
❗❗ Repurpose mason jars, old crates, or even cardboard boxes to make some cool storage containers that’ll add a unique touch to your crafting area. Maybe consider putting up some wall-mounted shelves made from reclaimed wood to show off your paints, brushes, or sewing supplies.
Hanging baskets or pegboards are also great for maximizing space and keeping your tools and materials within easy reach.
Create your own storage solutions to improve the functionality of your craft room and nurture the environment – give new life to the old stuff.
3. Design and Build a Pegboard Wall
When you’re looking to spruce up your craft room and get organized, consider designing and building a pegboard wall. It’s a versatile way to keep all your tools and supplies in order while adding a cool, creative vibe to your space.
As you set up your pegboard, think about how you want to arrange the hooks and accessories. Want to add a personal touch? Paint the pegboard a color that matches your room’s decor, or throw in some framed pictures or plants for a unique touch.
To get the most out of your pegboard wall, make sure it’s well-lit. Installing LED strip lights along the edges or above the pegboard will give you a bright and practical lighting solution.
Frequently Asked Questions
1. How can I turn my unfinished basement into a functional craft room?
There are several ways to transform your unfinished basement into a craft room. Add proper lighting, storage solutions, and a work surface. You should consider adding insulation and flooring to make the space more comfortable.
2. What are some budget-friendly ideas for an unfinished basement craft room?
If you’re on a budget, create a functional craft room in your unfinished basement. Consider using second-hand furniture and organizing supplies to save money. Repurpose items you already have, such as mason jars for storage or old curtains for window treatments.
3. How can I maximize the limited natural light in my unfinished basement craft room?
If your basement has small windows and limited natural light, make the space feel brighter and more inviting. Consider painting the walls a light color, adding mirrors to reflect light, and using task lighting for your work area. Install light fixtures and add plants to add some greenery.
4. How can I make my unfinished basement craft room organized and clutter-free?
Organization is key in a craft room, especially if you have limited space. Utilize wall space – install shelves, pegboards, and cabinets for storage. Invest in storage bins and label them for different supplies. Keep your work surface clear -use a desk organizer or a rolling cart.
5. Are there any safety considerations I should keep in mind for an unfinished basement craft room?
Yes, safety should always be a priority when setting up a craft room in an unfinished basement. Make sure to properly seal and ventilate any chemicals or potentially hazardous materials. Install proper lighting and make sure all electrical outlets and wires are up to code. Keep sharp objects and tools out of reach of children.
6. Can I use my unfinished basement craft room for other purposes as well?
Absolutely! Your craft room will serve as a multi-functional space for other activities. Consider adding a comfortable seating area for reading or a TV for movie nights. Incorporate a workout space or a small office area. Get creative and make the most out of your unfinished basement craft room.

